At the end of 2020, I set myself a target of trying to buy no unnecessary outdoor gear in 2021*, and promptly went on a frenzy of going through the various websites to make sure anything I wanted I got before the end of the year. Equivalent to starting a diet, but pigging all the cake the night before. Or having to finish up the Christmas chocolate / biscuits etc before starting one’s new January regime.
(* with a few exceptions: consumables like fuel and food are fine; emergency purchases if a critical item fails on a trip; routine replacement of worn out items like footwear; and specifically anything to make or repair my own gear – else this project would never happen).
And you know what ? I couldn’t find anything I wanted to buy. There was nothing that I needed, or even wanted from what was on offer.
But there is one thing I’ve longed for over the last few years – the perfect pyramid (“Mid”) style shelter. I’ve experimented with a few, but I’ve yet to find one that meets my needs exactly, and consequently there has been a bit of “turnover”.
In my forensic search of the outdoor gear sites, with particular focus on the cottage manufacturers, it struck me that I was no closer to finding the perfect shelter. At some point in this search, the idea struck me that maybe I’d have to make one. Not a serious thought at first, but the more I considered it, the less silly an idea it sounded.
And so I started thinking through what it was I wanted in the “perfect” mid. I actually have a pretty good idea, and really all that’s frustrated the quest so far is the fact that for every shelter with a feature that suits, there’s something about it that goes the other way. What I actually want is some sort of weird mix of a few different shelters. Being aware of this only enhanced the attraction of building something completely bespoke.
So let’s look at what those key features are, using a few shelters to illustrate (some of which I’ve owned, some of which I’ve avoided).
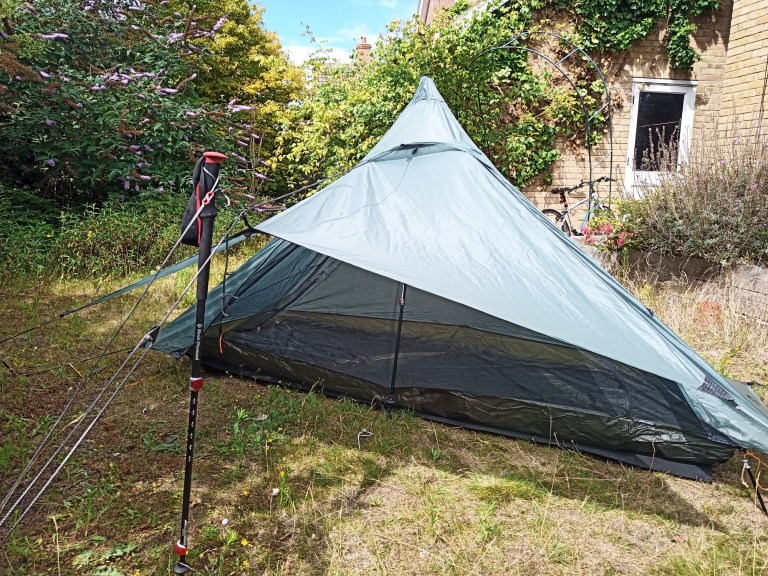
The Lanshan
The best place to start is the 3F UL Gear Lanshan 1, a fairly ubiquitous offering found all across Aliexpress, eBay and the Amazon Marketplace. Not to mention various dedicated import websites. I bought one of these out of curiosity last year.
If you look beyond the fact that it’s a (relatively) cheap Chinese knock-off of the Six Moon Designs Lunar Solo, it actually has a lot to commend it: the dimensions are good – incredibly the inner is quite short at 210cm, but the bathtub is vertical to an impressive height, which means that all of that 210cm can be used and there’s no inner tent fabric on your feet or face. Add to that the width of 75 – 95cm and it’s very liveable. The doors fly out over the vestibule leaving a decent gap, although they can be pitched lower to the ground. Design-wise the size and style of it is very close to what I want for nicer weather camping.

[At this point I should highlight that I’m talking about the standard version which has a separate inner, available as either a 3-season mesh or 4-season solid fabric. There is also a “pro” version which is a single skin integrated effort very much like the Lunar Solo itself.]
The key downside is the materials, and specifically the flysheet. It’s such a flimsy fabric that the ripstop looks printed on rather than structural. I certainly wouldn’t want to get a tear. When I had mine, I was liberal with the seam sealant in every stress point. The various fittings are cheap but suitably robust (ie heavy), and it’s put together fairly well. A lot of people use these as their main backpacking tent. In all conditions. Really the only thing wrong with it is the quality of the materials used. Which is why I moved it on pretty quickly.
Towards the end of my trawl through websites, I did check in on Aliexpress, but by this point more for inspiration and fact-finding, as the conviction that I was going to self-build had grown. I then stumbled across a “plus” version of the Lanshan – essentially the same as the standard but with a larger inner – 230cm long and width of 80 – 100cm. This is almost exactly the size I would go for in a self-build. I bought one.
I bought one, knowing that I had no intention of keeping it: no I would use it as inspiration, even going as far as reverse engineering it for my home build if it came to it. A Lanshan 1 Plus in decent materials is 90% + the sort of thing I’m after.
The Lunar Solo
The original, and many would say, best. I bought one of these in 2016 and loved it. I loved the all-in one pitching, light weight, and airiness in summer conditions. I liked less the condensation and chilliness in less than summer conditions and moved it on to a friend within a few months. He made more of a success of it and I briefly flirted with a second go.
It is a great shelter. Better materials than the Lanshan, lighter, but maybe not quite as well-made as some cottage manufacturers’ tents. But ultimately, I want something double skin. And moreover, to be able to use either a mesh inner or a solid fabric inner. Or even no inner at all.

I can lump in with this the Six Moon Designs Deschutes tarp, which together with an inner like their Serenity bugnet, effectively gives you a double skin Lunar Solo. But it’s not quite as spacious, and the efforts made to trim weight and the inferior (to the Lunar) door arrangement, mean this isn’t really any closer to the ideal.
Others
The Lanshan/Lunar represents pretty much the overall shape and size of shelter I’m looking for, with emphasis on use during the more cheerful months of the year. But if I’m going to build myself, I don’t need to restrict myself to a summer tent – can I extend it further into a full 3 season shelter ? And can I do something which allows for it to be used in the widest number of scenarios as possible ? For example, something that’s comfortable for campsite use, and can be closed up fully for privacy/security ? What about stealth use ? what about making it bearable if I’m stuck in the tent for a long night ?
Of course I could just make a rectangular pyramid in a stealthy colour and achieve much of that. Simple shapes too. But when you think about it, the tricky bit is not the big panels of the fly, but things like the doors, joining everything together at the top of the tent, and adding vents. It matters little whether the tent panels are nice regular shapes, so I might as well shape it as I want it. [I should probably say at this point, that I’m not thinking of anything like catenary cuts].
So what other design considerations do I want to include, and where does the inspiration come from ?
To extend it to cover the full 3 seasons, I’d want to be able to sit out nastier weather, possibly cold too. So I’d want to be able to fully enclose the tent if conditions dictated. So ideally I’d want a door arrangement that allowed both the airy canopy style of the Lunar/Lanshan and the “to the ground” style of a more normal mid shelter. That means special shaping to avoid a gap between the doors when opened out (or embrace it), or accept some overlap of the doors when pitched in storm mode.
Actually, an overlap of doors could give the opportunity to dispense with a door zipper, saving both sewing effort and risk, and eliminating a key point of failure. It likely wouldn’t save any weight as the loss of a zipper would be cancelled out by the extra fabric to create the overlap. Tipik-tentes do something similar with their Pioulou. But the Pioulou is not big enough inside, a problem mostly corrected by the new Pioulou XL, albeit at the cost of excessive shelter height, and a hefty price tag considering it’s made out of silpoly. Still not quite right.
Fully enclosing the tent means it really needs a separate vent, and this is another area where the Pioulou falls short. I’d need to find a way of incorporating one – either by wrestling with the complexities of juxtaposing a vent with a complex door arrangement, or sticking them on the sides. Hmmm.
Sitting out a storm also means space inside the tent. Whilst I’d be building around my preferred inner dimensions, I’d need some form of vestibule, unlike the Pretents Soloist, which does pretty much all of the above except for its meagre “width of a boot” vestibule. (It’s also not long enough in the inner, but if they ever do an XL version, my wallet would be in danger).
So, I need to add a bit of space in front of the pole, but getting the right amount is a fine balancing act. I want the shelter to have the smallest overall footprint as possible, as that maximises the pitching options. So I need to have enough, just enough, and no more. This is where my experience of MLD shelters comes in.
The Duomid, in its current incarnation, is 275cm x 160cm, and takes an inner of 239 x 86. The inner is fine, but the vestibule is bigger than I need. The Solomid XL takes the same inner, but is only about 140cm wide. Much better, but maybe a little meagre. This tells me I need to aim for a depth somewhere in between these to hit my sweet spot.
If I take all of the above elements, and build something in a sedate colour, I could be onto a winner.
Inners
The intention is to also make one or more inners. Most likely it will be one all-round inner, combining solid fabric at the bottom of the walls and mesh at the top. That probably offers the best balance of weight, wind resistance, warmth, ventilation etc. I’ll probably leave the inner doors as fully mesh, but may consider making some solid fabric panels that I can put on/take off with kam snaps or similar. That will make it a bit more versatile. And versatile is the key word for this shelter.
The inner will have an inverted T-zip, both because that offers the ability to open either side of the inner, or the whole thing; and also because that’s clearly easier than sewing a curved zip. Even though it means three zips rather than one much harder zip.
The inner will have quite high vertical walls on the bathtub part, although this will probably have to be a bit of a compromise as the higher the bathtub, the larger the fly dimensions need to be to clear the inner.
On which note, let’s talk about height. The draft design I’ve come up with looks like it will give me the flexibility to pitch at a height of 125-130 cm as standard, with a possible sensible maximum of 135cm if I want it really airy. But the measurements also seem to work pitching it all the way to the ground at 120cm high, and this does seem to give some clearance between the fly and inner. They key is to aim for something that’s flexible, and which can also be achieved without having to add an extender to the pole, or join two trekking poles together. I think it’ll work. The inner will be 115cm high in any case.

Worst case, I’d be able to use the shelter with an existing inner. The Lanshan plus inner is exactly the same dimensions, or I could use my 4-season lanshan inner which is the shorter length so will fit easily. With a high pitch my MLD inner should fit too. I’m also going to see if adding a couple of hooks to the inside of the side panel pullouts will work to allow me to use a ultralight bivvy like the Valley & Peak Bivvy. The key is versatility.
I also plan to buy enough fabric to make just a bathtub floor that will fit. Indeed I’ll probably do that before a full inner as a practice run.
What Else ?
By now I have a pretty good idea of the main characteristics of my ideal bespoke shelter. But there are a few other considerations….
- Do I have a target or maximum weight ? Well, no not really. I’d expect it to come in under 1kg as all the shelters I’m comparing it to do, and I’d probably use similar materials. I’m not going to skimp on fittings or robustness though, just to shave off a few barely noticeable grams.
- What materials ? My starting assumption was that I’d use something equivalent to the above mentioned shelters – something in the 20D/30D range in silpoly or silnylon. That’s reasonably available, and comes in a decent choice of colours at an ok price. But I’d be lying if I said I hadn’t considered using DCF. DCF would be quite a commitment for a first tent, and at around 3x the price per square metre (around $17 for DCF compared with around $6 for a slightly wider piece of silpoly), it’ll be costly. DCF comes on narrower rolls too, so it would be more difficult to fit the panels and I’d end up buying a longer length. Obviously, though, with DCF I’d have more ability to join bits together so it might not be too much of an issue. At the end of the day, it just seems foolhardy to attempt my first MYOG shelter in DCF.
- Sewing skills ? As in none really. I did a bit at school and can sew a button or patch on. But I’ve never used a sewing machine, so there’s a whole new thing to get to grips with. But plenty of people seem to manage it, and you only have to look around YouTube for various examples of people getting stuck in. It feels like learning to use the machine is doable. But it will need some practice first.
- How do I build up to making a whole tent ? The last thing I want to do is plunge straight in – I’ll make mistakes and they’ll possibly ruin the end result. No I need to practice first, and I can do that as follows:
- Make some smaller projects first – stuffsacks etc, just to build confidence. The goal will be to make something I can actually use which is far better than simply sewing stitches in a piece of scrap material. At the very least, the tent itself will need a bag.
- Design it properly. I’m designing the shelter using a free online CAD tool (Sketchup), and will then take the measurements, together with my geometry skills, and build a 2D pattern. I will also pitch any tents I have in the garden for inspiration and to check things. Including the Lanshan Plus.
- Prototype. First I’ll do a scale model in paper to get a sense of what the overall shape would look like, and also to confirm the maths. I’ll refine the design and repeat the paper model until I’m happy. Then I’ll move onto a full size prototype using cheap cotton. I’ve bought enough to have a couple of attempts if necessary. By the time I’ve sewn a cotton prototype, I should have enough practice to do the real thing. Or at least have a good handle on my weak areas. One thing I think will evolve in real time on the cotton prototype is the vent/door arrangement, which looks ok on screen but may be different in real life.
- Keeping a record. I think a lot of people would love to have a custom designed shelter to their exact requirements, but probably shy away from it due to a perception that it’s too much hassle/effort or too difficult. I’d like to think that documenting the journey would be useful to someone. So I’m intending to keep a record of the build, through plans, this series of blog posts, and maybe a video or two. I’m also intending to keep track of the budget – mostly for information purposes, and not because it’s a constraint in itself. If I avoid DCF, then budget isn’t the issue at all. I’d like to think, though, that I could do the build for less than buying at retail prices a similar shelter of similar quality materials.
In the next post, I’ll go into more detail of the design and the specific requirements, and start talking a bit about the materials I hope to use.
The project itself will be considered a success if I end up with a tent that is usable in any way, and if I understand what worked and what didn’t, and would know how to avoid the same pitfalls next time. There is no intention to make a business out of this, before anyone asks!
The build will be undertaken very cautiously, with a lot of focus on measuring and confirming before cutting and sewing itself. From the research and design already undertaken, the sewing itself doesn’t seem that complicated – what is complicated is the plan for how to put everything together and in what order, and which way around. It is already apparent that the key to this project lies less with actual sewing ability and more with planning and organization. Maybe throw in some mathematical competence too. Planning, organization and maths is something I CAN do.
Wish me luck!
You’ll need a sewing machine, of course. I treated myself to a Brother innovis15 a couple of years ago. Have made a tarp which was a success and some clothing repairs. It’s a great machine. It comes with the usual foot pedal, of course, but it can also be controlled with an adjustable hand control. I’ve never used the foot pedal and often use the slowest speed.
LikeLike
Yeah, we’ve actually got 2. Still need to assess whether they’re up to the job.
LikeLike
As someone studying design, with an eye on the outdoors, I will be interested to see your progress. I, too, have yet to find what I consider my ideal perfect tent.
LikeLike
No pressure then!
LikeLike
Could you do the design work, materials buying etc and outsource the sewing?
LikeLike
Well I’m pretty sure I could, but that does somewhat lessen the challenge and the resulting achievement. I just see it as a skill to be picked up, just like in my art I experiment with new materials and techniques. Most of the battle is learning how to use the machine. I also need to allow for the fact that I may want to tweak the design as I sew, which would obviously be a lot more problematic if I outsourced that part.
LikeLike
I will follow this with interest…
LikeLike
Oh crikey. You’ve got me curious now. I have the sewing skills, but thankfully no design or maths skills, I’m safe. I think.
LikeLike
Be careful, or I’ll send it up to you to sew together!
LikeLike
Er…I could crochet one. Might not be watertight…
LikeLike
cool
LikeLike