A while ago, I decided I could do with something to use in the summer when it’s warmer, as my other bedding options can be a bit too warm in the height of summer. So rather than spend loads of money buying one, I decided to make one.
The design would be simple – it’s essentially three layers of fabric placed on top of each other, sewn around the edge then turned inside out. The most important thing being to put the layers in the right order so that when turned inside out, everything’s in the right place.
I used my existing Valley & Peak Classic Quilt as a guide to how big I’d want to make it. That measures 220cm long by 137cm (top end) / 113cm (bottom end). That quilt also has a zip for 69cm from the bottom.
My V&P Quilt is bigger than I’d need for summer though – I’m not looking for something I can snuggle under, merely enough insulation for a cooler night in summer. So I decided to lop 20cm off the length and go with 200cm length, keeping the widths the same as my V&P quilt, and dispensing with a zip, or indeed any form of additional hardware. This would be a simple flat quilt, albeit slightly tapered to save a bit of bulk and weight where it wouldn’t be needed.
I ordered the materials last autumn in anticipation of the project, expecting to make it over the winter ready for use at the start of the summer, but things slipped a bit, and I’ve only just got around to it. Once I got going it didn’t take that long.
Materials
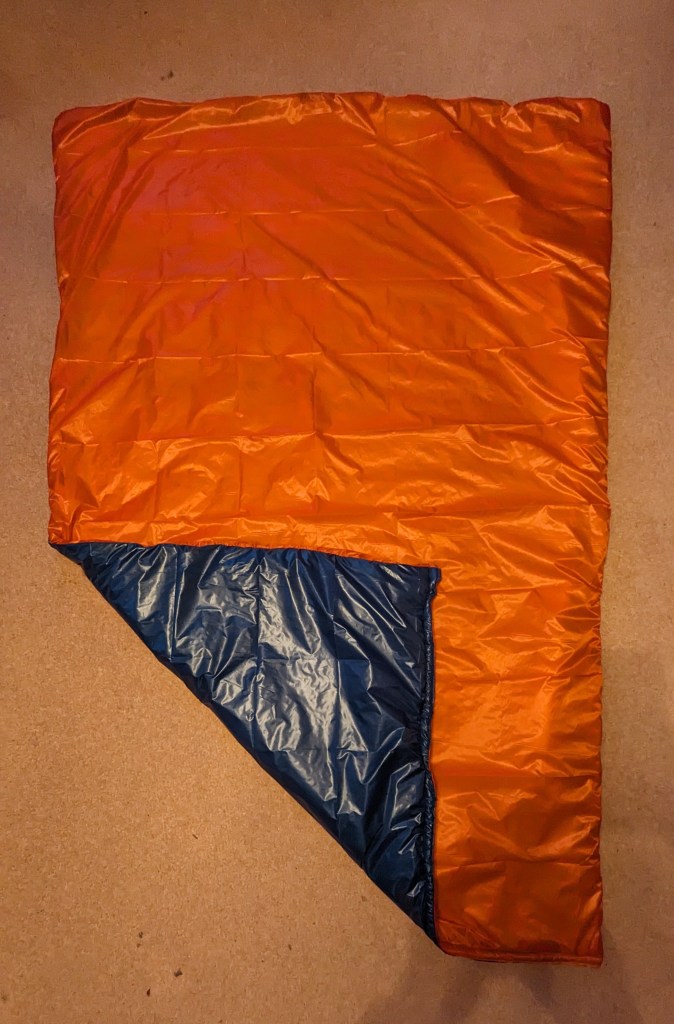
For the outer I went with 0.9oz Membrane 15 poly taffeta (26 gsm) in orange for the top, and navy blue for the underside.
For insulation I used Climashield Apex 2.5 oz / sqyd (85 gsm). This is the lightest weight (and hence least warm) of the insulation Ripstop by the Roll sell. They rate it as about 50F / 10C which is plenty warm enough for high summer.
I already had orange thread, but no blue, so decided to simply go with the orange. The way the quilt is constructed means none of the stitching should sew (but see later…)
Method
The first step was to make a pattern. Given that I needed to produce 3 identical (or as near identical as I could practically make them) layers, a pattern was the way to go. The introduction of a taper also meant that I couldn’t simply use symmetry and simple rectangles to make the job easier.
My pattern paper, a roll of simple brown paper, is exactly 1m wide, which meant that the sensible thing to do was make a pattern for the top and bottom halves and then join then. This meant I needed to work out the width at the mid point.
The final pattern produced was 200cm long, 142cm wide at the top, and 114cm wide at the bottom after allowing for seam allowances. Given I was working with 1m wide paper, I decided to allow the seam allowance at the ends to be included in this for simplicity. This meant I’d lose 4cm off the length, plus any general “shrinkage” encountered through the build.
Pattern produced and sellotaped together, I transferred to the lounge floor to lay out the fabric and cut out with the pattern. This was straightforward enough with the fabric being used for the outer. In each case I pinned the pattern to the fabric as the size and slipperiness of what I was working with needed it really.

Doing this for the insulation was a lot harder, as it “gripped” the carpet and wasn’t as easy to flatten out. In the end I flipped it so that the pattern was on the carpet and the insulation on top. That made it harder to see where to cut, but a bit of care and a lot of checking got me there.
Having learned this lesson, I left the insulation attached to the pattern until I’d finished assembling the layers.
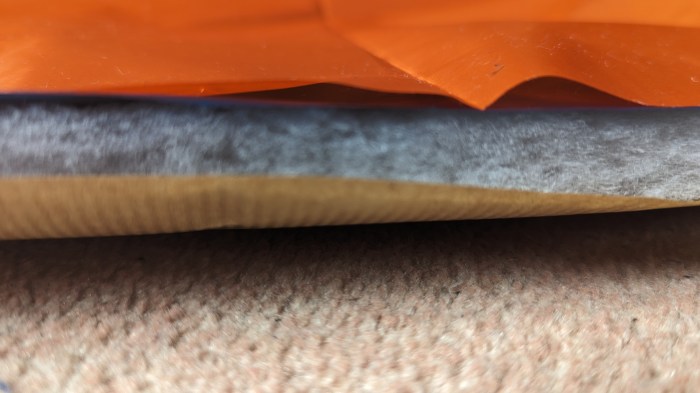
Next I layered up – top (right side up), then above that the underside, with right side down. Then the insulation on top (doesn’t matter which way up that goes).
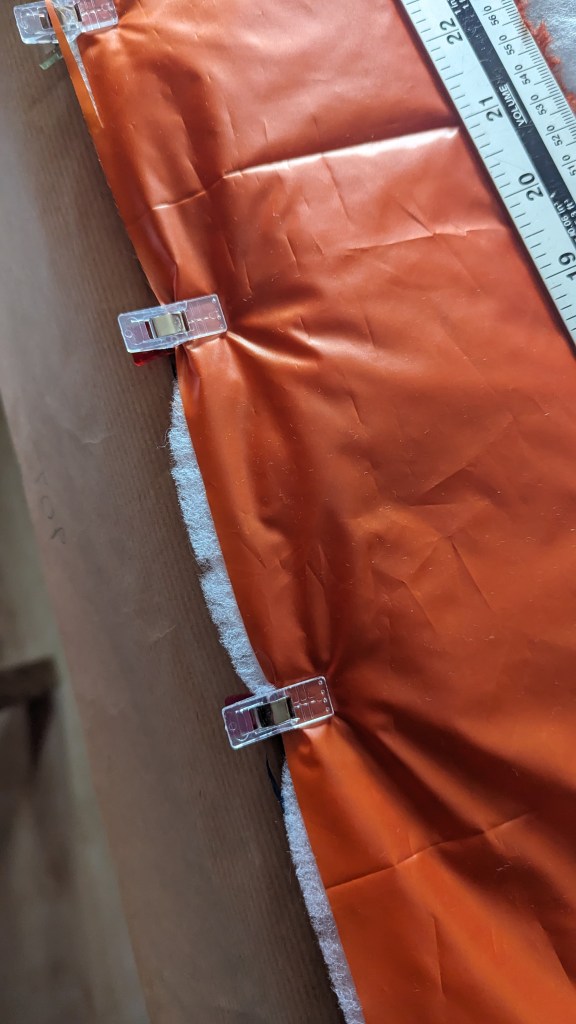
With everything all clipped together I transferred to the sewing table and removed the pattern – I didn’t want to sew that to the quilt!
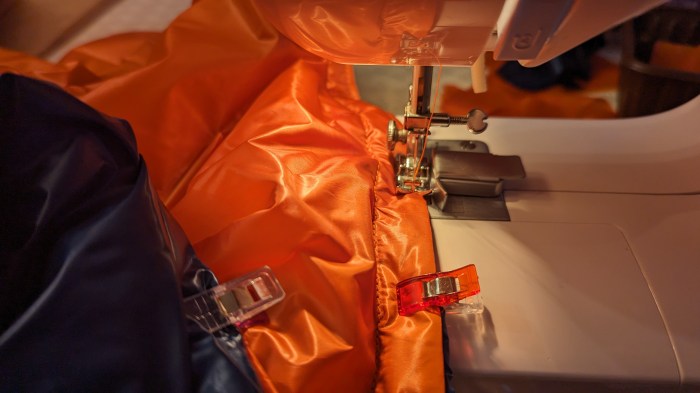
The first pass through the sewing machine was awful – I knew the insulation wouldn’t feed very well if it was on the bottom so I did it the other way up. Unfortunately, it kept getting caught in the foot, which meant sewing with the foot up and periodically untangling it. In hindsight this was utterly stupid. Moreover, slippage of the insulation meant it spread beyond the end of the fabric.
My wife suggested placing a strip of something on top of the insulation – so that it was sandwiched between fabric that would flow properly through the machine. This would end up being part of the quilt though, unless I used something like tissue paper and then carefully ripped it off afterwards, which I’ve done before on other makes. I didn’t feel that would work so well here, so instead went for using the offcuts of membrane fabric to edge the quilt. Width wasn’t important – it just needed to be wide enough to protect the foot from the insulation. Neither was aesthetics – it would be hidden inside the quilt when finished, so any old scraps could be used and trimmed as roughly as I liked.
I tried this on the opposite side to the first attempt and it worked first time. So I then did the top end of the quilt before committing to unpicking the first side and redoing with the “shield” method.
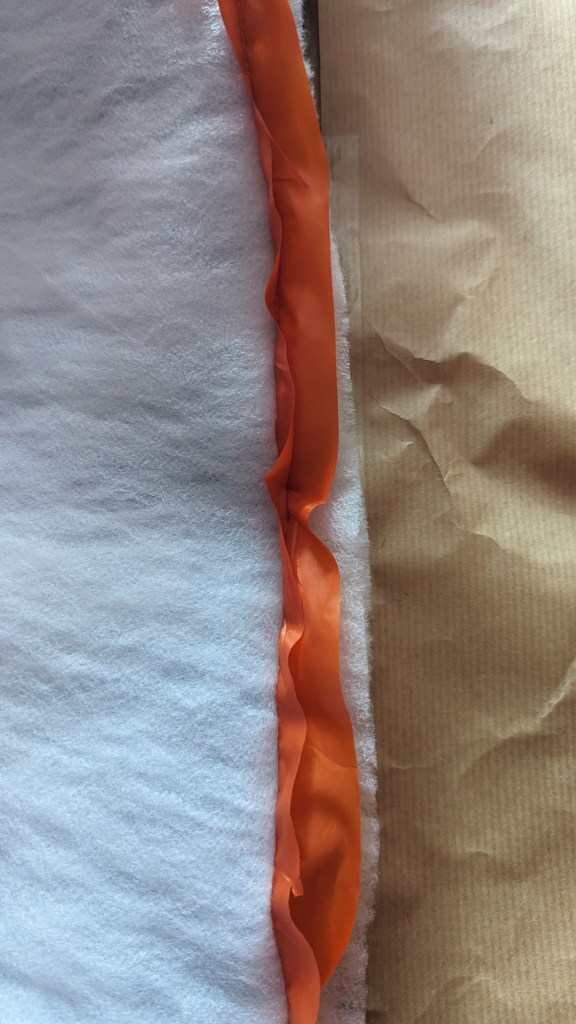
This all worked well, and after trimming away the excess “shield” I just had the open end to deal with.
I’d already decided that rather than attempt to “bag out” the quilt through a tiny hole, and then have the problem of neatly closing it, I’d simply close the foot end after bagging out the quilt.
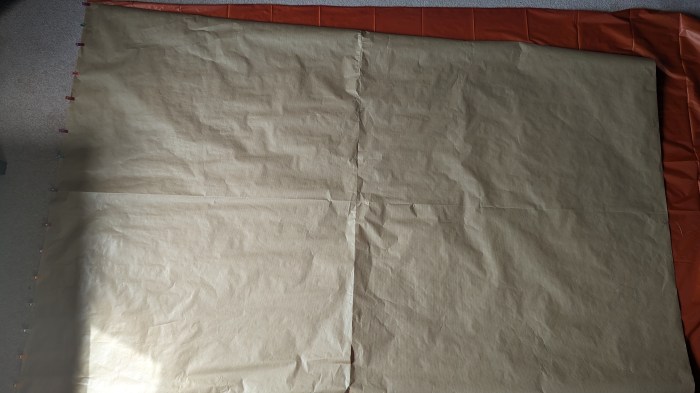
So the next stage was to turn it right side out. And it looked alright.
To make matters easier, in closing the final side, I pre-sewed a portion of the bottom to the insulation at the foot end – this would simply make it easier to roll inside to form the hidden seam. This worked well, although care was needed not to catch the top layer, which had to be held out of the way.
I then rolled the bottom layer and insulation inwards and clipped. I then repeated with the top layer and added this to the existing clipped portion.
To actually close it, I simply top stitched a line about an inch from the edge, and then another as close to the edge as I could. To make it as inconspicuous as possible I used orange thread for the needle (top), and black on the bobbin (as I don’t have any navy blue).
With it all closed as neatly as I could manage, I smoothed it all out on the lounge floor and tried it out.
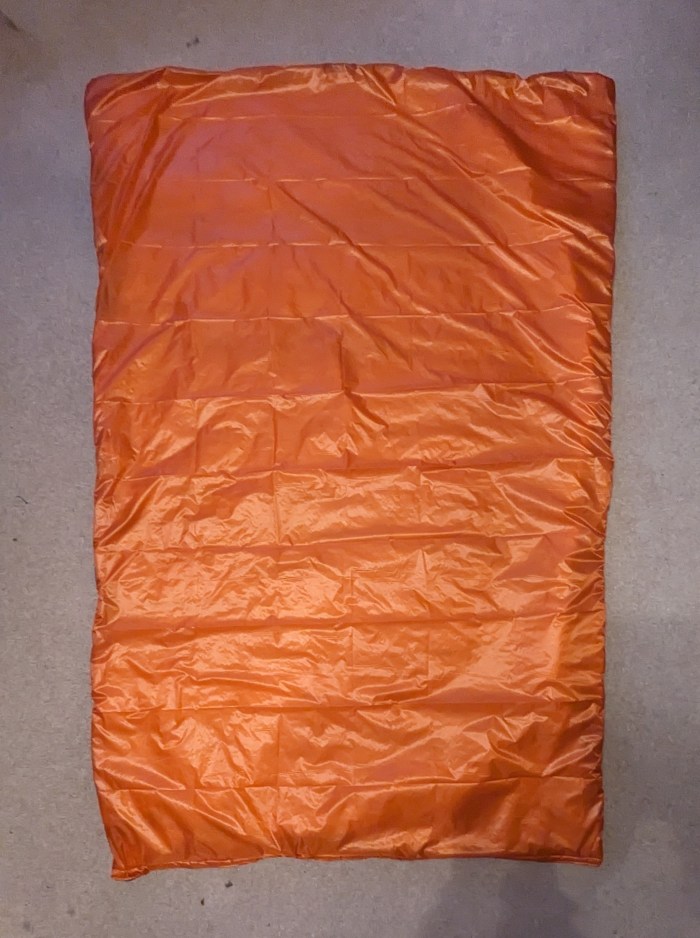
The final dimensions turned out to be 187cm long, 129cm wide at the top and 105cm wide at the bottom. I’d lost about 9cm all round in the production process, in addition to the seam allowances I’d planned. This will just about be ok.
I then popped it on the scales and it came out at 371g, which I was pretty pleased with.
(from the fabric specs I worked out it should be 351g plus thread plus the extra “shielding” strips, plus natural variation in the fabrics themselves).
I’ll be taking the quilt with me on The Ridgeway this week to see how it does.
Interesting and well done. As it happens, I made something very similar this year, using materials from Ripstop by the Roll. The outer is 1.0oz HyperD in blaze orange calendered, the inside 1.1oz ripstop nylon in black uncalendered and the insulation 2.5oz Climashield. The top width is only 97cm but I added a 15cm draft stopper along each side and made a rudimentary foot box. I may add bits of Velcro at the top to secure it around me as the ripstop is quite slippery and I get cold spots. Overall, I’m pretty happy with it. Took it to the Peak District recently for a trial.
LikeLiked by 1 person